
- September 19, 2024
How to Prepare Candles at Home: A Step-by-Step Guide for DIY Enthusiasts
Join me as I discuss into the tranquil world of DIY candle-making, where creativity flows as freely as the wax I pour. Making candles at home isn’t just about crafting; it’s a journey that infuses my space with warmth and a unique personal touch. Whether you’re aiming to spruce up your home décor or looking for a calming hobby, let me walk you through the mesmerizing process of crafting your candles. From selecting the perfect materials to the joy of lighting your finished product, discover how simple and fulfilling this timeless craft can be.
Choosing the Perfect Candle for Relaxation and Decor in My Home
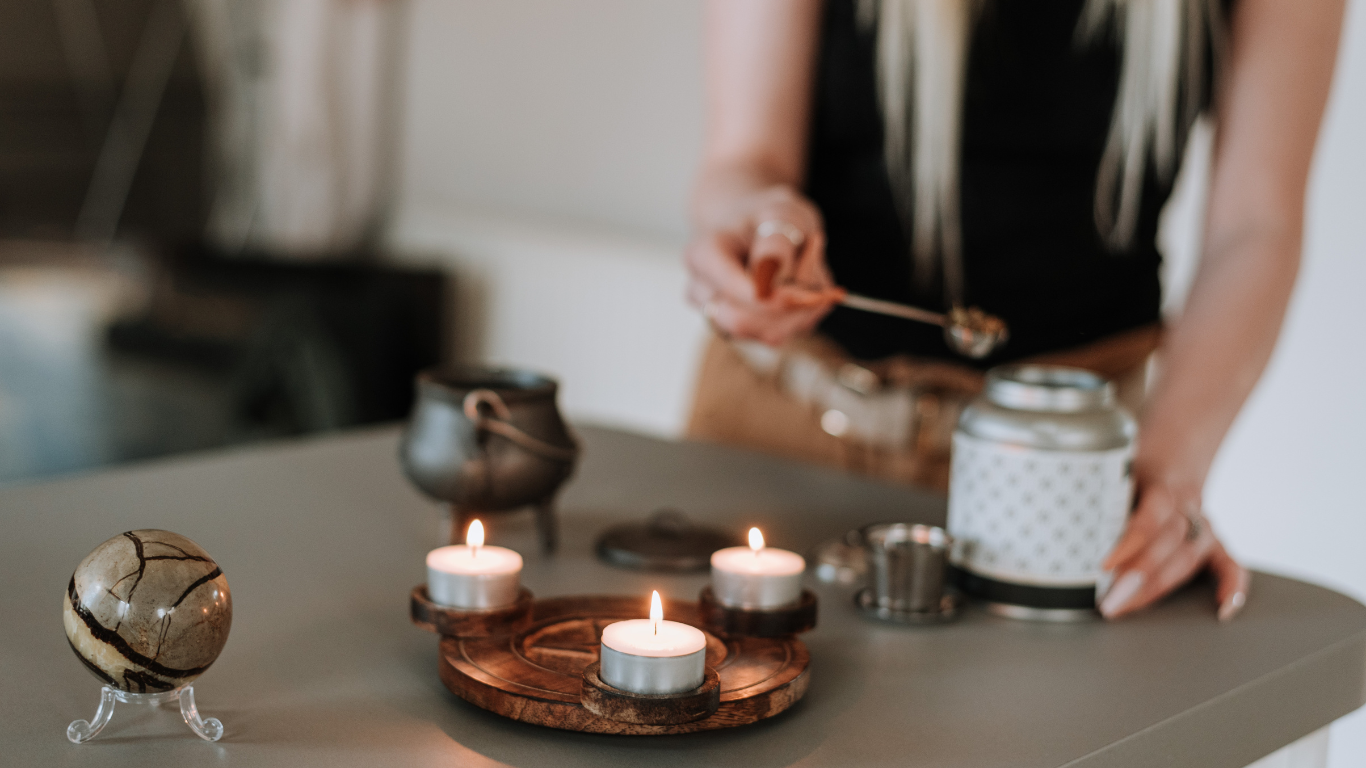
When it comes to transforming any room into a serene haven, choosing the right candle is key. I start by thinking about the purpose of the room and its décor. In my living room or den, I love setting up larger pillar candles as they create a cozy atmosphere and can be a striking centerpiece. In my bathroom or bedroom, I opt for scented container candles with calming fragrances like lavender or chamomile to enhance relaxation. The colors and designs of my candles always complement my existing décor, whether it’s through contrasting vibrant colors or blending in with gentle, neutral tones. The material—be it beeswax, soy wax, or paraffin—also plays a critical role, as each provides different aesthetics and burn times, allowing me to tailor my choices to suit my needs.
Creating Ambiance with Candles in My Home
The magic of candlelight never fails to transform my ordinary spaces into realms of comfort and reflection. To maximize the ambiance, I consider the placement and grouping of my candles. A solitary candle on my coffee table serves as a minimalist centerpiece, whereas a cluster of candles at varying heights on my dining table or mantle creates a lively and dramatic flair. The gentle flicker of candlelight softens the room, making it feel more welcoming and lived-in. I always ensure to place candles safely away from any flammable items and out of the path of frequent movement.
Health and Wellness: The Surprising Benefits of Candles at Home
Beyond their aesthetic appeal, candles bring significant psychological benefits to my life. Lighting a candle signals my brain to unwind, setting the stage for increased serenity and concentration. The act of gazing at a flame is meditative, helping to reduce stress and enhance self-awareness. Aromatherapy candles elevate this experience by filling the air with soothing scents that can uplift my mood, lessen anxiety, and even assist with sleep, especially when I choose fragrances like lavender or sandalwood before heading to bed.
Enhancing the Home Atmosphere with Candles
The sensory experience of candles extends beyond just sight and scent; it includes the warmth they add to my home. During gatherings, candles provide soft lighting that fosters intimacy and conversation. They also help me celebrate the seasons or special events, turning my house into a home. For daily use, I treat lighting candles as a ritual to start or end my day, a gentle nudge to remind me of life’s simple joys.
How to Prepare Candles at Home: A Step-by-Step Guide for DIY Enthusiasts
Dive into the world of DIY candle-making where creativity meets tranquility. Making candles at home is not just a craft; it’s an experience that fills your space with warmth and a personal touch. Whether you’re looking to enhance your home decor or seeking a relaxing hobby, this guide will walk you through the enchanting process of creating your candles. From choosing the right materials to the delightful moment of lighting your finished candle, discover how easy and rewarding this age-old craft can be.
Choosing the Perfect Home Candle for Relaxation and Decor
Selecting the right candle can transform any room into a sanctuary. Start by considering the room’s purpose and decor. For living rooms or dens, larger pillar candles create a sense of warmth and can become a focal point. In bathrooms or bedrooms, consider using scented container candles to promote relaxation with fragrances like lavender or chamomile. The color and design of the candle should complement the existing decor, whether through contrasting bold colors or harmonizing with soft, neutral tones. Materials also play a crucial role—beeswax, soy wax, or paraffin each offer different aesthetics and burning times, allowing for customization based on your preferences and the room’s needs.
Creating Ambiance with Candles in My Home
The magic of candlelight truly transforms my living spaces, turning ordinary areas into cozy retreats for comfort and introspection. To enhance the ambiance, I carefully consider where and how I place my candles. A single candle on my coffee table acts as a minimalist yet elegant centerpiece, while an arrangement of candles in various heights and sizes on my dining table or mantlepiece adds a dynamic and theatrical touch. The flickering light softens the room, creating a welcoming, lived-in feel. Safety is paramount when I set up my candles; I make sure they are placed far from any flammable materials and not in the paths where people frequently walk.
Health and Wellness: The Surprising Benefits of Candles at Home
I’ve found that beyond their aesthetic appeal, candles have significant psychological benefits. When I light a candle, it signals my brain to unwind, which helps increase my sense of calm and focus. Watching the gentle dance of the flame is meditative, helping me reduce stress and enhance my self-awareness. My aromatherapy candles go a step further, filling the air with soothing scents that lift my spirits, alleviate anxiety, and even aid my sleep, especially when I choose fragrances like lavender or sandalwood before bedtime.
Enhancing Home Atmosphere with Candles
The sensory experience of having candles in my home extends well beyond sight and smell; it’s about the warmth and ambiance they bring. During social gatherings, the soft illumination from candles fosters a warm, inviting atmosphere that encourages intimacy and conversation among my guests. They also help me celebrate the changing of the seasons or special occasions, adding a festive touch that makes my home feel more inviting. Daily, lighting candles has become a cherished ritual for me, marking the beginning or end of my day with a soft, comforting glow, reminding me to appreciate the simple joys of life.
DIY Candle-Making Tutorial
Take up the journey of crafting your candles with this simple yet detailed guide:
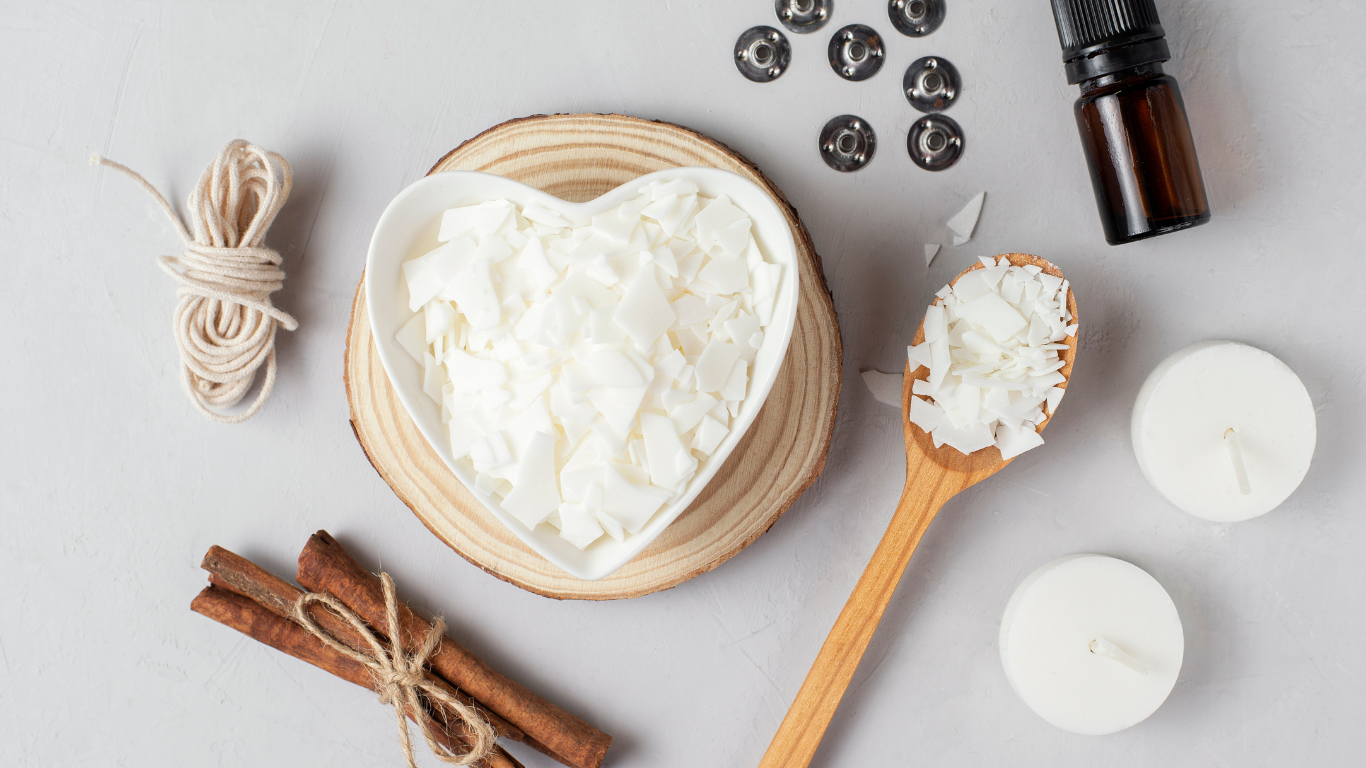
1. Gather Your Materials:
Begin by collecting all the necessary supplies. You’ll need:
- Wax: Choose from different types such as paraffin, soy, or beeswax depending on your preference for burn time and eco-friendliness.
- Wicks: Cotton wicks are most common, but there are also wood and hemp wick options.
- Heat source: A kitchen stove or an electric hot plate works well.
- Molds: These can be anything from specifically designed candle molds to everyday items like mason jars or teacups.
- Fragrances and Colors: Essential oils or candle scents for fragrance, and dye blocks or liquid candle dye for color.
2. Melting the Wax
The safest way to melt wax is using a double boiler setup:
- Fill a large pot about one-third full with water and place it on the stove to heat.
- Put the wax in a smaller pot or heat-resistant glass container and then place this into the larger pot.
- Heat until the wax melts completely. Keep the heat medium to avoid overheating the wax, which can be dangerous.
3. Preparing the Mold
While your wax is melting, get your mold ready:
- Secure the wick: Attach one end of the wick to the bottom of the mold using a wick sticker or a dab of melting wax. Ensure it’s centered.
- Hold the wick in place: You can use a wick bar, a pencil, or even a chopstick placed across the top of the mold to keep the wick centered and straight while you pour the wax.
4. Adding Fragrances and Colors
Once the wax is completely melted, it’s time to add personality to your candle:
- Fragrance: Add fragrance oils when the wax is hot but not boiling—usually around 180°F (82°C). Stir gently to ensure even distribution.
- Color: Add your dye to the melted wax and stir well. Start with a small amount and add more to reach your desired shade.
5. Pouring the Wax
- Pour slowly to avoid bubbles.
- Keep the wick centered and upright as you pour.
- Fill the mold to the desired level, remembering that the wax will slightly shrink as it cools.
6. Setting the Candle
Allow the candle to cool and harden, which may take several hours depending on the size of the candle and the temperature of the room:
- Avoid moving the candle until it has fully hardened.
- Once hardened, trim the wick to about a quarter inch above the wax to ensure proper burning.
7. Curing the Candle
For the best results, let your candle cure:
- Leave it untouched for a couple of days to let the fragrance oils bind fully with the wax, enhancing the scent when burned.
Candle Safety Tips
- 1. Never Leave Candles Unattended: Always extinguish candles when leaving a room or going to sleep.
- 2. Keep Away from Flammables: Ensure candles are placed away from curtains, books, and other flammable materials.
- 3. Use Proper Holders: Always use a candle holder specifically designed for candle use to catch dripping wax and avoid fire hazards.
Candle Maintenance and Care
- Trim the Wick: Before each use, trim the wick to about 1/4 inch to ensure a cleaner, brighter burn.
- Clean the Wax Pool: Remove any debris or matches that might have fallen into the wax pool to prevent uneven burning.
Ready to Light Up Your World?
Delve deeper into the craft of candle making and discover even more DIY tips, decor ideas, and wellness advice on our blog. Whether you’re a seasoned candle enthusiast or just starting, there’s always something new to spark your creativity. Don’t miss out on our latest posts—explore more here and join our community of passionate DIYers!


